
Initializing NVIR systems

Search pages

Guides // Getting Started

Commander's Handbook

Training, the tools worth bookmarking, the rules that keep a ship, and how to keep it fuelled — before you undock.

01

Training Is a Separate Menu

Training is not inside your commander save. You run it from the main menu, before you ever sit in the Sidewinder that actually belongs to you.

Launch the Elite Dangerous executable. On the title screen you get Continue, your commander list, options — and a Training (or Tutorials) entry of its own. That is the practice ground. It does not spend your credits, it does not risk your ship, and it does not count as your first hours in the galaxy.

Work through Basic Flight, Docking, Travel, and Combat before you load the real save. If you own Odyssey, run the on-foot tutorials the same way. Stay in them until docking, boosting, and requesting a pad feel boring. The live galaxy will not pause while you look up a bind.

Start in Solo or a private group. All three modes share one save. Solo and private groups have NPCs (Non-Player Character: A ship or person nobody is flying — crew, security, pirates, and traffic.) only. Open Play (The shared galaxy where other commanders can find you — and shoot you. Solo and private groups do not.) is the same galaxy with other commanders who can shoot you. Learn the loop somewhere nobody is hunting you for sport.
02

Four Tools Worth Bookmarking

The cockpit does not plan trade routes, find mining hotspots, or cost a refit. These four are enough for a beginner. Put them on a second screen before you undock.

ToolWhat it is for
Inara Stations, ships, modules, commodity prices, and "where do I find this?" The default lookup.
ED Tools Mining hotspots, ring types, and similar maps. Use it when someone says platinum in a pristine metallic ring.
EDSY Ship outfitting calculator. Cost a fit before you buy the modules. NVIR prefers this to Coriolis.
EDMC Runs in the background, reads your journal, and keeps Inara and the rest current. Leave it open.
Install EDMC on day one. The other sites are only as good as the traffic feeding them. One extra window on your desktop is the whole job.
03

Rules of Survival

Two habits cover most of the pain new commanders walk into. Ignore them and the galaxy is a lot more expensive.

Never fly without rebuy (The insurance excess to get your ship back after it explodes — about 5% of hull and modules.). Insurance is about 5% of hull and module value. If the ship is destroyed and you cannot pay, it is gone and you drop back to a free SidewinderKeep credits for at least two rebuys, and do not undock in a hull you cannot buy back.
Cheap ships forgive mistakes. Fancy empty hulls do not. A fitted Cobra you can rebuy (The insurance excess to get your ship back after it explodes — about 5% of hull and modules.) is safer than a stripped Python you cannot afford to rebuy (The insurance excess to get your ship back after it explodes — about 5% of hull and modules.).

The Cockpit Readout

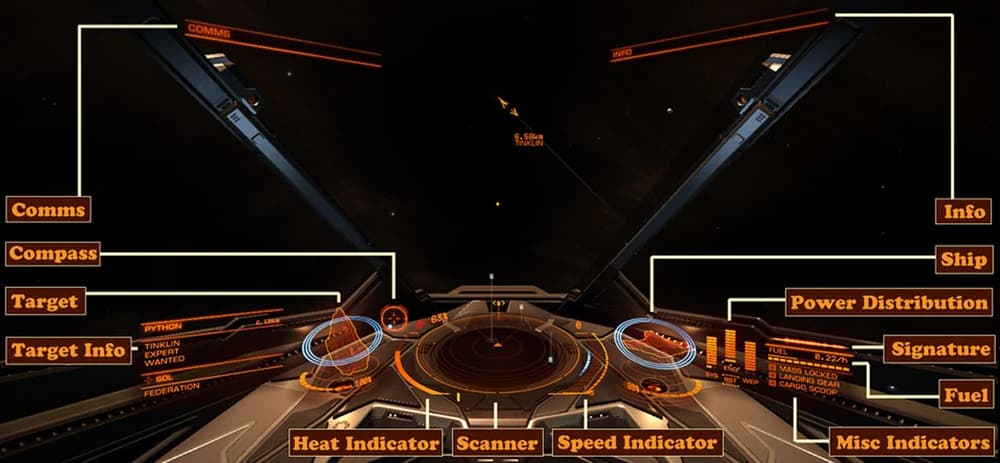
In order to survive in the galaxy, you need to be aware of your ship's status. The fuel gauge, hull and shields are visible in the cockpit. Always keep your eye on those to avoid unexpected situations.

The image of the cockpit where the fuel gauge, ship status such as hull and shields is visible. Capture: in normal space after a couple of jumps, close enough that the bar and its segments can be read. - Source Elite Dangerous Fandom
The image of the cockpit where the fuel gauge, ship status such as hull and shields is visible. Capture: in normal space after a couple of jumps, close enough that the bar and its segments can be read.Elite Dangerous Fandom

Refueling

Fuel strands new commanders more than pirates. Every jump burns fuel and the tank does not refill itself. Check the gauge before you undock, and never plot a route longer than the fuel you are carrying.

There are three ways to fill the tank

01

Buy it at a station

Refuel is part of Starport Services on every station and outpost, and it is cheap on a small hull. The catch is the pad: an outpost has no large pads, so a big ship cannot land there to buy fuel. Check the pad size before you plan a stop around it.

02

Buy it from a Fleet Carrier

A carrier can sell fuel, but only if its owner has installed and switched on the refuel service — many have not. Useful far from stations, and the price is whatever the owner set.


03

Scoop from a fuel star

Fit a Fuel Scoop and you can refill from a fuel star (A star that can be scooped for free fuel. Only main-sequence classes K, G, B, F, O, A, M can be scooped — remember them as KGBFOAM.) at no cost. Drop out of the jump, turn along the surface, and hold in the scooping band until the tank fills. Heat climbs while you scoop, so watch the temperature.

Filter the route plotter before a long trip. The Galaxy Map can plot a route through scoopable stars only. Use it on any trip out of the district, or you will find the next star is one you cannot scoop. Running dry is a call to the Fuel Rats, not a lesson you wanted.
D-rated modules for weight. D-rated (Modules are sized 1–8 and rated A–E. A is best and heaviest, D is lightest, E is cheapest.) is always the lightest in class. D-rated sensors and life support are an easy jump-range gain on a budget. A-rate the Frame Shift Drive (Frame Shift Drive: The drive that does both jobs: hyperspace jumps between systems, and supercruise inside them.) and the things that keep you alive. E-rate is cheap and heavy — skip it when you can.
04

Cockpit Interface

Four panel views plus the HUD. Learn where docking, cargo, and the next jump live before you need them with a pirate on the scanner.

01

Target Panel — Key 1

Left panel. Navigation, the system you are in, station contacts, the ship you have targeted, and local transactions. Request docking and plot the next jump from here.

02

Comms Panel — Key 2

Top panel. Local chat, squadron chat, direct messages, wing (A group of up to four commanders flying together and sharing mission credit.) invites, and NPC (Non-Player Character: A ship or person nobody is flying — crew, security, pirates, and traffic.) chatter. Mute it if it is noise. You will not miss a docking assignment.

03

Role Panel — Key 3

Bottom panel. SRV (Surface Recon Vehicle: The wheeled buggy you drive on planet surfaces. Needs a Planetary Vehicle Hangar.), ship-launched vessel (Ship-Launched Vessel: A small craft launched from a medium or large hull — a combat fighter flown by you or by crew, or the Nomad, which lands where your ship cannot.), Fleet Carrier, on-foot loadout, and crew. Empty for a long time. You do not need it in your first hours.

04

System Panel — Key 4

Right panel. Modules, cargo, power priorities, fire groups, and the self-destruct. Check cargo and fuel here before you undock. Silent Running lives here too.

05

Flight Mechanics

A ship moves in six directions: forward and back, up and down, left and right, and it rotates on three axes — pitch, roll, and yaw. Thrusters do all of it, so there is no wing to stall and no ground to fall towards. Whatever you do not cancel, you keep.

Turning

Yaw — swinging the nose left and right — is deliberately slow on almost every hull. Roll onto your side first, then pitch. It feels wrong for about an hour and then it never feels wrong again. Yaw is for the last degree of aim, not for turning around.

Speed decides how tightly you turn. The throttle bar has a small blue band near the middle: inside the blue zone (The blue band on the throttle where your ship turns fastest. Not the same as the landing approach band.) the ship turns at its best rate, and above it every extra metre per second widens the arc. Pinning the throttle forward makes you fast and clumsy. Most new commanders fly far too fast to get their nose anywhere.

Boost is a burst on top of that — useful to close a gap, break a lock, or leave. It costs a chunk of the engine capacitor, so it is not a cruise setting, and it is never the right move inside a station.

Flight Assist

Flight Assist (Flight Assist: The computer that kills drift and holds your attitude. Switching it off gives you raw Newtonian flight.) is on by default, and it is the computer firing thrusters against you the moment you stop asking for a manoeuvre — it kills your drift, holds your heading, and caps you at the throttle setting. Switch it off and none of that happens: the ship keeps its velocity and its rotation until you cancel them yourself.

Know which bind toggles it. Flight Assist off is a real skill and worth learning later, but hitting it by accident mid-approach is how a Sidewinder ends up embedded in a station. If the ship suddenly drifts, spins on past where you stopped, or will not slow down, check that indicator first.
06

Launching & Docking

The way in and out of a starport is the mailslot (Station Mailslot: The letterbox slit in the face of a starport, and the only way in or out. Mind the speed limit.) — the slit in its face, wide enough for two ships and no more. Everything below is about crossing it without paying for it.

There is also a module that does it for you. A Docking Computer (An optional size-1 module that does the approach and landing for you. Standard only auto-docks while Advanced both docks and launches automatically.) takes the controls once you have clearance and flies the landing — throttle, power, and landing gear included. Both versions are size 1, so they fit any optional slot on any hull.

Standard Docking Computer

Docks for you. Request clearance, drop the throttle to zero inside 7.5 km, and it takes you in and lands you. Launching is still yours.


Advanced Docking Computer

Docks and launches. Newly bought small ships come with one fitted, which is why your first undock may happen without you touching anything.

Learn the manual approach anyway. The computer needs granted clearance and a free pad, and it will not save a ship that arrives too fast or in the wrong lane. Fly it by hand until it is dull, then let the module have the boring landings.

Launching

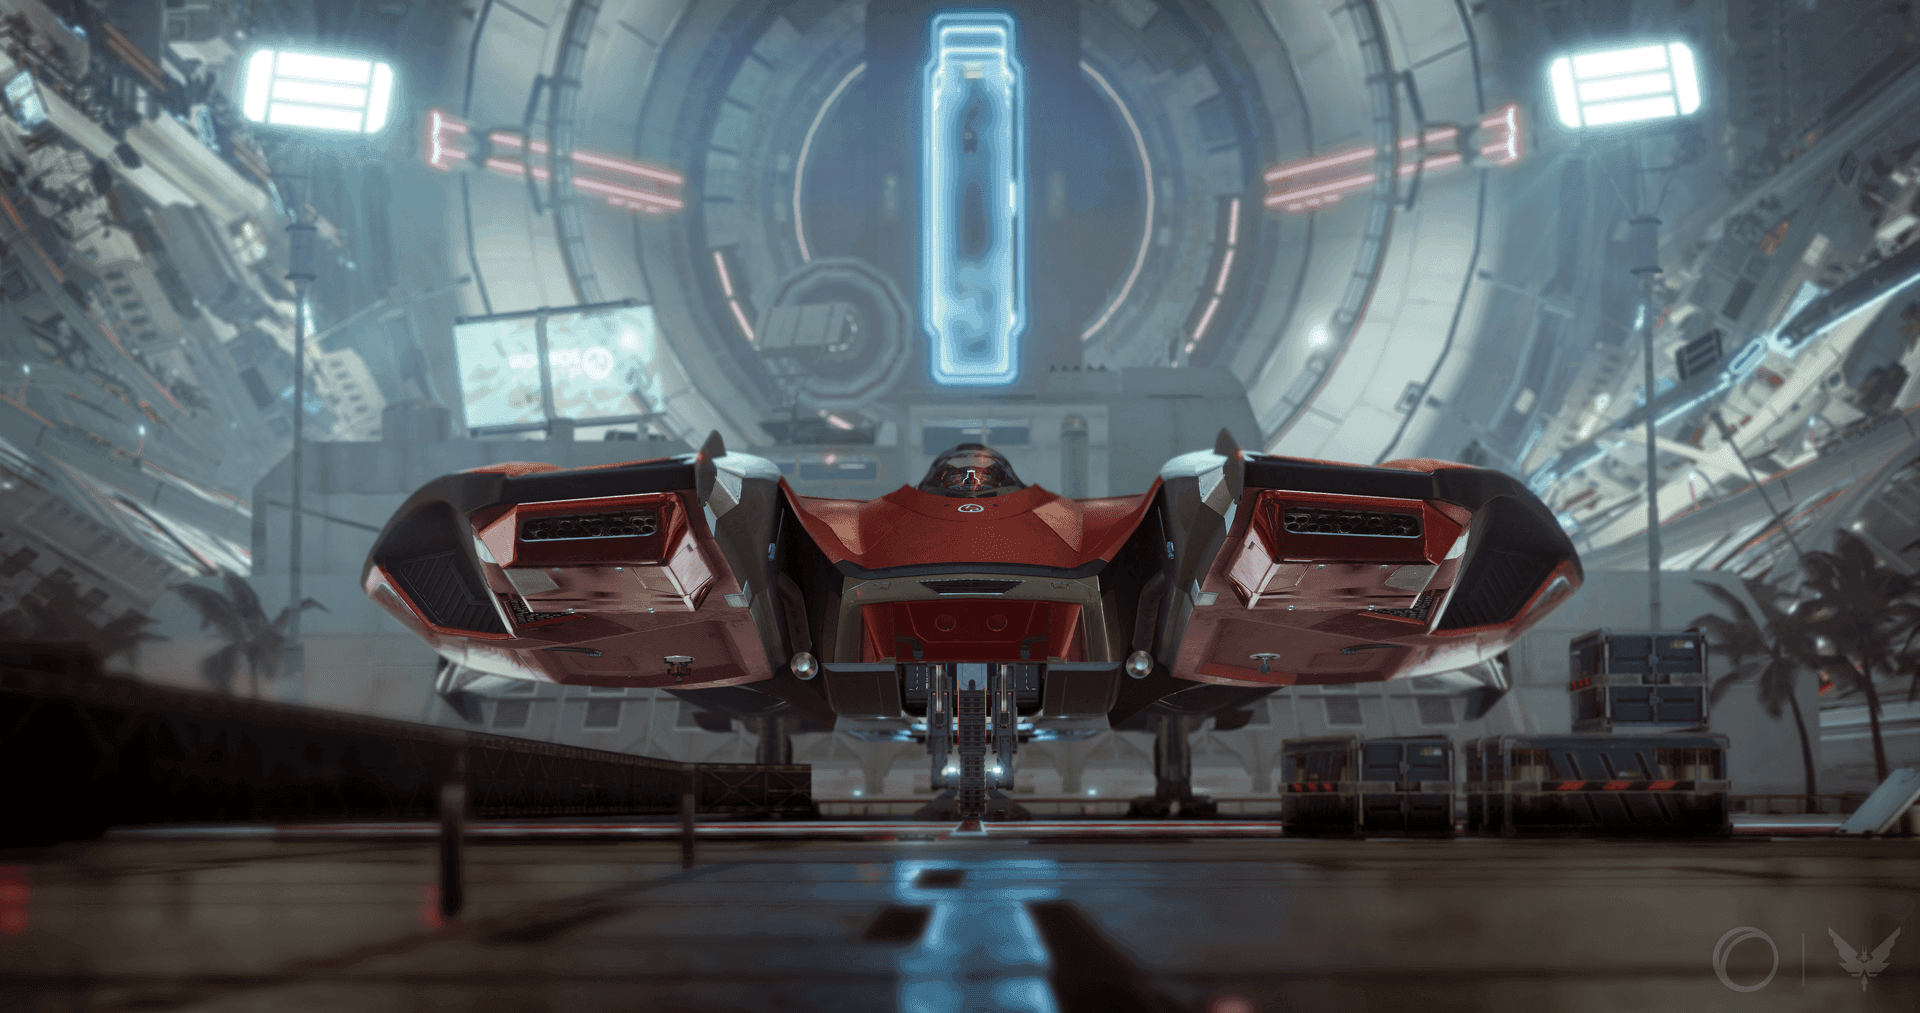
The image of the station interior looking towards the mailslot. - Source Elite Dangerous Forums
The image of the station interior looking towards the mailslot.Elite Dangerous Forums

Launch from the left panel and the pad lifts you clear on its own. The starport interior is busy, so before you touch the throttle, look at the slot: ships coming in have right of way and they will not stop for you. Wait for a gap.

Raise the landing gear as soon as you are off the pad and before you line up — gear down caps your speed, and you want the throttle back before you cross. Hold under 100 m/s until you are outside; the starport calls anything faster reckless, and a collision at that speed is a fine on top of the repair bill.

The slot is lit from the inside too, and the rule does not change: keep the green. Traffic control says it out loud on the way past. Because you are facing the other way, the green lane going out is the opposite half of the slot to the one you arrived through — which is the point, since it keeps the two streams off each other.

The starport rotates, and the mailslot rotates with it. Roll to match it yourself on the way through — rotational correction holds your alignment once you are inside the starport, not out at the slot. Night vision helps if the interior lighting is washing the slot out.

Docking

01

Request from 7.5 km

Left panel, Contacts tab, select the starport, request docking. Inside 7.5 km it answers with a pad number and a ten-minute clock. Outside that range there is nothing to request — close the distance first.


02

Approach the lit face

Only one face of the starport has the slot, and it is the one with the lights on. Fly around to it rather than looking for a door on the side you happen to arrive at.


03

Line up on the green

The slot is lit red down one side and green down the other. Green is your lane; red is the half outbound traffic uses. Roll until the slot is level in your view with the green on your right, and hold that line all the way through.


04

Cross slowly, then drop the gear

Under 100 m/s through the slot, gear still up. Deploy the landing gear once you are inside and heading for your pad — it caps your speed, which is what you want among the pads and not what you want in the slot.


05

Land on the hologram

Find your pad number, hover over it, and match the hologram: the notch on the pad marker points the way your nose should face. Settle at a few metres per second. The pad does the rest.

No permission, no entry. Crossing into the access corridor without a pad assigned is a fine, and the starport gives you about ninety seconds inside before its guns solve the problem. If clearance is refused, your ship is too large for any free pad — outposts have no large pads at all.
07

Supercruise & Hyperspace

One drive does both jobs. The Frame Shift Drive (Frame Shift Drive: The drive that does both jobs: hyperspace jumps between systems, and supercruise inside them.) jumps you between systems in hyperspace, and once you are there it carries you between the star, the planets, and the starports in supercruise. Normal space — the thrusters and the speeds in the last section — only covers the last few kilometres.

Supercruise

Supercruise is faster than light and still slow enough that a system takes minutes to cross. Point at your target and hold the throttle: speed builds the further you are from a gravity well and bleeds off as you close on one, which is why the same trip feels fast in the middle and sluggish at both ends.

The HUD gives you two numbers that matter — distance to target and time to arrival. Fly the clock, not the distance.

The 7-second rule

Approaching a starport or planet, drop the throttle to about 75% when the arrival time reads 0:07 and hold it there. The clock stays near seven seconds while you close, and you drop out at a workable speed. Too fast and you sail past — the loop of shame (Overshooting a station in supercruise and having to turn around and come back. Everyone does it.), a slow turn and a second run at it. Too slow and you crawl in for a minute.


Throttle down out of a jump

You arrive facing the star with the throttle where you left it. Cut it immediately: the star is a gravity well and a heat source, and flying into one is the most common way a first long trip ends.


Drop out on purpose

Within 1,000 km of the target the HUD reads SAFE DISENGAGE READY — drop there and you arrive intact. Above 1 Mm/s the computer refuses and warns you; push through the warning and you get an emergency drop instead, which costs hull and leaves the drive cooling before it will carry you anywhere.


Supercruise Overcharge

An SCO-capable drive dumps extra acceleration into supercruise on demand — minutes off a long in-system run. It burns fuel several times faster and heats the drive while it is held, so it is a tool for crossing 100,000 Ls (Light-Second: Distance inside a system. A station 200,000 Ls out is a long supercruise, jump range be damned.), not for the last hop between two stations.

Hyperspace

A hyperspace jump moves you between systems, one system per jump, and it costs fuel scaled to the distance. How far you can reach in a single jump is your jump range — set by the drive, the hull, and above all by what the ship weighs. A full cargo hold shortens every jump you make.

Plot in the Galaxy Map

Pick a destination in the Galaxy Map (The between-systems map. Plots routes, filters stars by class, and is where every trip starts.) and it plots a route in jumps. Economical routes take more jumps but burn less fuel; fastest routes take the fewest jumps. On a small hull the difference is minutes, so take economical while you are learning.


Target, charge, jump

Select the next system from the left panel, line the nose up on it, and hold the jump bind. The drive charges, the stars stretch, and you arrive at the far end. Nothing can follow a hyperspace jump, which is why it is also the escape hatch — see high wake (Leaving by hyperspace jump to another system. Nothing can follow you through it.).


Watch the fuel, not the route

The map will happily plot a route you cannot finish. Check the fuel gauge against the jumps ahead, and filter the plotter to scoopable stars before any long trip.

Distances are in light seconds inside a system. A starport 500 Ls (Light-Second: Distance inside a system. A station 200,000 Ls out is a long supercruise, jump range be damned.) out is a couple of minutes in supercruise. One 200,000 ls out is a serious trip — check that number on the System Map (The inside-one-system map. Bodies, ports, and how many light seconds out each one sits.) before you accept a job that ends there.
08

Power Distribution

The three pip (Power Distributor Pips: Six units of capacitor power split between SYS, ENG, and WEP. No group takes more than four.) groups on the right of the HUD are SYS, ENG, and WEP. You have six pips to split between them, and no single group takes more than four. Defaults are fine in supercruise.

This is not a combat control. Every role moves pips: a trader dumps them into ENG to break an interdiction, a miner holds four in WEP so the mining laser never cuts out, an explorer runs ENG to climb out of a gravity well. Learn the three groups now and every later guide can just say “four to SYS”.

01

SYS — Systems

Powers shield recharge. Four pips (Power Distributor Pips: Six units of capacitor power split between SYS, ENG, and WEP. No group takes more than four.) in SYS can raise shield damage resistance by up to 60%. Put pips here whenever something might hit you — a fight, a hard landing, or a scan you cannot avoid.


02

ENG — Engines

Raises top speed, turn rate, and boost recharge. This is the escape setting: four in ENG to run from an interdiction (Being pulled out of supercruise by another ship. Escape by keeping the marker centred, or submit.) or a pirate. It also keeps you in the blue throttle zone (The blue band on the throttle where your ship turns fastest. Not the same as the landing approach band.), where the ship turns tightest. Boost is a burst of speed — never boost inside a station.


03

WEP — Weapons

Cools the weapon capacitor, so energy weapons keep firing. That covers mining lasers and abrasion blasters as well as guns — a miner runs WEP as hard as a bounty hunter does. You do not need it on a courier run.