Remote Release Flak Launcher
One is enough. It bursts a whole cluster of needles at once. A dumbfire missile rack works too, but flak clears more per shot.
 Initializing NVIR systems
Guides // Gathering
The crystal-shard circuit out in the black — seven sites, seven G4s, one evening.
One circuit fills the whole raw grid. Seven crystal-shard sites, roughly 1,500 ly out, cap the seven G4s in an evening — then a Raw trader converts that stock down into every row beneath them. It flies best in a Mandalay.
Surface biology that grows crystal needles. Break a needle and it dumps Grade-4 raw — the top of that element group. Raw never goes above G4, so a shard field is the ceiling for its material.
There are seven raw groups, each with a single G4 at the top. This circuit visits all seven. Cap those bins ~1,500 ly out, fly home, and convert down at a Raw trader — the G3 and G2 rows fill from that stock. You do not gather them one by one.
A thick field caps the 150-unit G4 bin in minutes with limpets (A single-use drone that collects, prospects, repairs, or researches. Weighs a tonne and rides in the hold.). You rarely need that much: a modest top-off still converts into a full lower-grade stack. The run also counts toward the Professor Palin unlock if that is still open.
The fast way is to shoot the shards and scoop with limpets from the ship — the Anti-Xeno Initiative (Anti-Xeno Initiative: The community group that documents Thargoid combat and material gathering.) rates this well above crawling the field in an SRV (Surface Recon Vehicle: The wheeled buggy you drive on planet surfaces. Needs a Planetary Vehicle Hangar.). Any explorer with a hardpoint and a limpet controller does it. Engineering is optional; jump range is what matters over 1,500 ly.
One is enough. It bursts a whole cluster of needles at once. A dumbfire missile rack works too, but flak clears more per shot.
One or two controllers. Bring B-rated (Modules are sized 1–8 and rated A–E. A is best and heaviest, D is lightest, E is cheapest.) limpets (A single-use drone that collects, prospects, repairs, or researches. Weighs a tonne and rides in the hold.) — the longest range — and a small cargo rack of ~20 to hold them. Limpets are cargo; the raw they fetch is not.
One cheap slot. Maps the dense patches so you land next to shards, not empty rock.
The deep pair sits ~1,500 ly out. Keep an engineered FSD (Frame Shift Drive: The drive that does both jobs: hyperspace jumps between systems, and supercruise inside them.) if you have one. Add a Planetary Vehicle Hangar + SRV (Surface Recon Vehicle: The wheeled buggy you drive on planet surfaces. Needs a Planetary Vehicle Hangar.) for Selenium and as the flak-free fallback.
Four bodies at HIP 36601, two at neighbouring Outotz LS-K D8-3, and Selenium at HR 3230 near the Bubble (The Bubble: Inhabited space around Sol, roughly 400 ly across. Everything outside it is the black.). Distances are straight-line from Sol.
| # | Body & System | Coordinates | Material | Group | From bubble |
|---|---|---|---|---|---|
| 1 | C 1 A · HIP 36601 | -57.4599, 126.9543 | Polonium | Group 6 | ~1,600 Ly |
| 2 | C 1 D · HIP 36601 | -51.2639, 14.7291 | Ruthenium | Group 3 | ~1,600 Ly |
| 3 | C 3 B · HIP 36601 | -17.6769, -55.1800 | Tellurium | Group 5 | ~1,600 Ly |
| 4 | C 5 A · HIP 36601 | 3.5500, 111.5415 | Technetium | Group 2 | ~1,600 Ly |
| 5 | B 5 A · Outotz LS-K D8-3 | -1.9216, -145.7013 | Yttrium | Group 1 | ~1,715 Ly |
| 6 | B 5 C · Outotz LS-K D8-3 | -62.4905, 80.2426 | Antimony | Group 7 | ~1,715 Ly |
| 7 | 3 A A · HR 3230 (Brain trees) | 45.66, -30.49 | Selenium | Group 4 | ~425 Ly |
Same drill on every body: confirm the world from cruise, then line up the coordinates from up high before you drop. Done from the SRV (Surface Recon Vehicle: The wheeled buggy you drive on planet surfaces. Needs a Planetary Vehicle Hangar.) it becomes an hour of crawling.
Discovery-scan the system. A shard world lists surface signals. Crystals sit under Biological, not Geological.
Glide in, switch to Analysis mode, and probe the body to Mapped. Aim for 90%+ coverage.
Cycle the heat map to Crystal Shards and look for the dark blue areas — the densest patches. Steer by the lat/long on the HUD toward the site coordinates.
Numbers move faster from cruise. Match the coordinates up there, then drop almost straight down.
Fix latitude first by flying heading 0° or 180°. Once you are within a few degrees, turn 90° or 270° for longitude.
Hold the first axis to ±1–2° while you dial the second to ±0.5°. The last stretch is visual — spend the final kilometres low and slow.
Set down beside a dark-blue patch with clear sky above it, so limpets (A single-use drone that collects, prospects, repairs, or researches. Weighs a tonne and rides in the hold.) have room to work.
Shoot the part that holds the material, scoop the fragments. Shards and brain trees share that loop — they differ only in what you aim at, and whether you do it from the ship or the SRV (Surface Recon Vehicle: The wheeled buggy you drive on planet surfaces. Needs a Planetary Vehicle Hangar.).
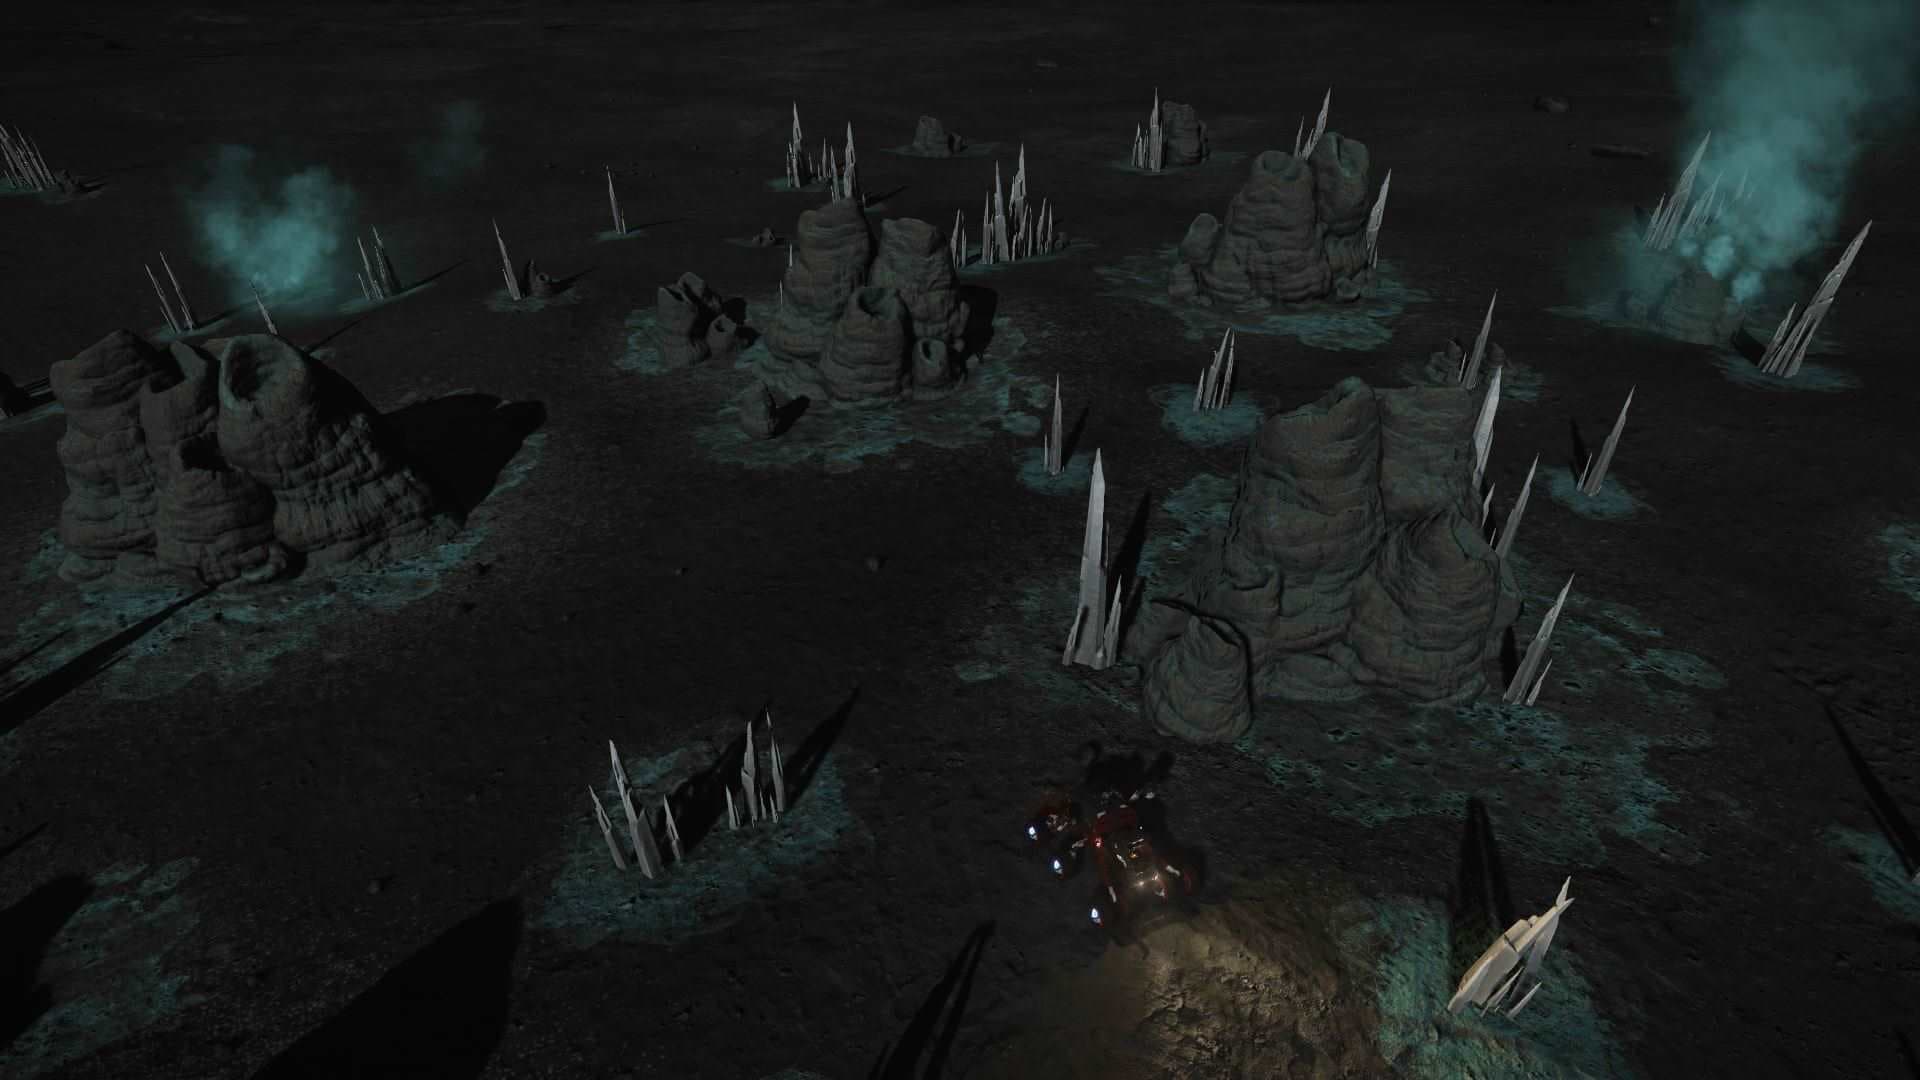
Deselect any contact. With no lock, launched limpets (A single-use drone that collects, prospects, repairs, or researches. Weighs a tonne and rides in the hold.) free-roam and grab everything in range.
Put a flak burst into a cluster of needles. One shot shatters several into scoopable fragments. Aim for the needles, not the fat base — the base drops nothing.
Deploy the batch with the cargo scoop out. They fetch fragments into the weightless raw inventory. When a material hits 150 they simply stop collecting it.
Burst the next cluster while the limpets (A single-use drone that collects, prospects, repairs, or researches. Weighs a tonne and rides in the hold.) clean up the last. A dense field has more shards than you need — reposition when the patch beside you is bare.
No hardpoint or limpets? Drive up in the SRV (Surface Recon Vehicle: The wheeled buggy you drive on planet surfaces. Needs a Planetary Vehicle Hangar.), shoot needles with the plasma repeater, and scoop the fragments over the cargo scoop. It works and needs no engineering — it is just slower, which is why the flak run is the default once you have the ship.
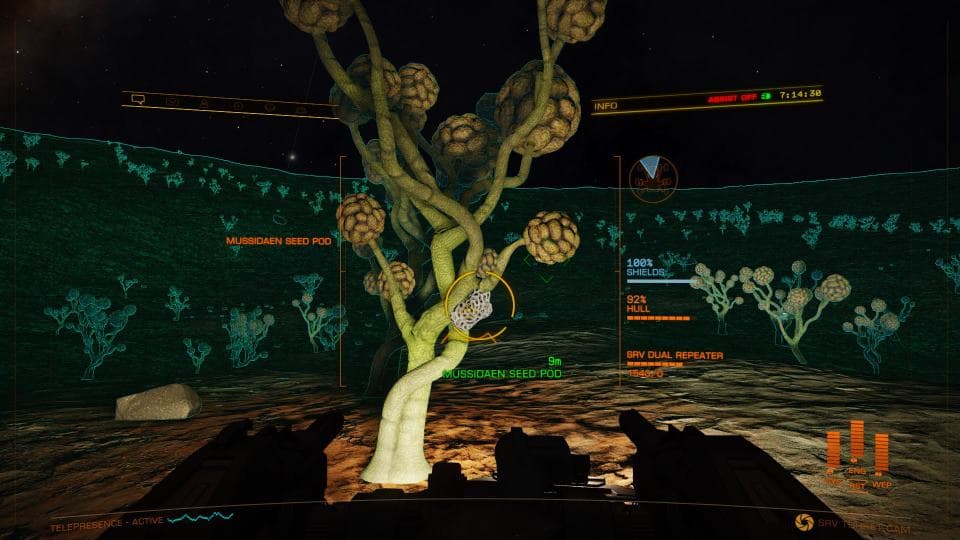
Selenium has no crystal-shard site — it only drops from G2 nodes. Brain trees are the best source, gathered like shards: about one tree in seven carries a gold, fruiting pod. Shoot the pod, scoop the fragments, drive to the next fruiting tree.
Fly home with seven G4 bins topped, then trade down at a Raw trader — find the nearest on Inara. The G3 and G2 rows fill from that stock, and the G1 commons piled up while you flew.
| G4 collected | Trades down to | G1 common (incidental) |
|---|---|---|
| Yttrium G4 | Niobium G3 · Vanadium G2 | Carbon G1 |
| Technetium G4 | Molybdenum G3 · Chromium G2 | Phosphorus G1 |
| Ruthenium G4 | Cadmium G3 · Manganese G2 | Sulphur G1 |
| Selenium G4 | Tin G3 · Zinc G2 | Iron G1 |
| Tellurium G4 | Tungsten G3 · Germanium G2 | Nickel G1 |
| Polonium G4 | Mercury G3 · Arsenic G2 | Rhenium G1 |
| Antimony G4 | Boron G3 · Zirconium G2 | Lead G1 |